Scottie makes mail.

Scott wearing a mail hauberk. Claude de la Beche

You should too. Everyone should make mail.

Just make mail, dammit!

...and lay off the junk mail.

Overview

Mail armour predates the Roman empire: earliest finds are in graves of Scythian warriors, 5th century BCE. The Romans' first contact with chain mail was through Celtic tribes in Gaul. Early on it was used solely to prevent bits of warriors being carved away by swords. Now it's used by divers to prevent bits of them from being gnashed by sharks and by butchers to reduce the finger content of ground beef.

It was originally made by linking four closed iron loops into a fifth and riveting that one closed. However, that's extremely labour intensive so most mail is now made out of steel that is hard enough not to require riveting. The mail I make and am describing here is sometimes referred to as "butt mail" because it is made of links that are closed loops broken (not cut) off of a coil resulting in clean flat butt joint. If the wire were cut it would have pinched ends and would be more likely to fall apart when the links' joints aligned.

It is possible to make different patterns of mail. For example, a pattern of every link passing through six others (three above and three below) is sometimes called "double mail" but there are no known examples of this from the medieval era. It makes rather heavy and less flexible mail. I tried it and didn't like it much.

Size

There're definite pairs of wire gauge and link diameters that yield the most pleasing look and feel to mail. After some trial and error I have settled on these. The winding rod colour codes may or may not be standard for steel rods at hardware stores. Memorize it; you'll be tested later.

Wire gaugeInside diameterWinding rod
14 GA.0.31" (5/16")red
16 GA.0.25" (1/4")blue
18 GA.0.19" (3/16")green
20 GA.0.11" (7/64")a heavy coat hanger

If you stray much beyond these suggested servings you'll end up with mail that is to open and doesn't provide adequate coverage or is too closed, is heavy and inflexible. ("heavy" is a relative term here; this is steel we're speaking of so it's all heavy.)

Tools

You'll want:

  • A steel rod appropriate for the size of mail links you wish to make. It'll need a hole drilled through one end to thread the wire through.
  • A variable speed, reversing drill with a chuck large enough to accommodate the steel rod of your choice.
  • A wood block with a hole bored through it slightly larger than your steel rod to act as a guide to spin the rod in.
  • One pair of dyke-cutters (end or cross cutting wire snips). Double action are great if you can find them.
  • Two pair of long-nose pliers with which to put it all together.

Materials

For steel wire, I use galvanized electric fence wire. I 've found that a farm co-op store is a good source. For brass, I use anything I can get my hands on because it's so hard to come by. You may have to have it ordered especially and buy some minimum like 50 lbs. of it. Apparently, some poor misguided fools use aluminum. I guess they don't appreciate the sensation of 60 lbs. of steel being carried on your knees for hours. Go figure.

Method

Make the coils:
  • Clamp the winding rod in the drill chuck.
  • Insert the rod through the guide block.
  • Thread the wire through the hole in the rod.
  • Slowly advance the drill while keeping tension on the wire.
  • Once the rod has a full coil wrapped around it, stop the drill, cut the wire at the both ends and slide the finished coil off the rod.
  • Repeat this process several hundred times.

Make the links:
  • Hold the coil in one hand.
  • With the other hand use the end cutters to make an indentation in the top of the first loop.
  • Grip the bottom of the first loop and twist it upwards.
  • The loop should snap off at the dent you made at the top.
  • Repeat this process several thousand times.

Weave the mail:
  • Use two pairs of long-nose pliers to close some links. Collect a quantity of these.
  • Open one link and place four closed links onto it.
  • Close that loop making a set of five connected links.
  • Make several of these sets and then connect them together.
    like so:

Shape the garment:
  • Another method of extending the mail is by adding links by row. This method is useful when tapering the piece.
  • To increase the width (or circumference) of a piece add an extra 'idler' ring so that next row you can treat it as a usual link and thus make the piece one link wider. This should be done at regular intervals for a gradual symmetrical expansion or concentrated in one area to create an irregular shape. The blue link in the figure below is an idler. It passes through the same two links above it as the orange link to the left but an additional one below.
  • To decrease the width, loop 3 links instead of two and then the subsequent row will have one less link. Note the red link, below, passes through three links above it but only two links below.
  • To make a sharp angle joint, make a series of triangles and join their sides. This is useful for coifs.
The rest is up to you. You can look at museum pieces, ancient text illuminations or the Bayeaux Tapestry for sources and inspiration if you're concerned about keeping the project historically founded. On the other hand you may just want a cool bit of decoration for your jacket or some jewelry. Anything is great. Just make mail. Lots of mail.
bracelet keychain sampler keychain sampler

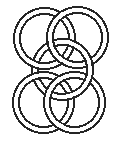
Here's a bracelet made from a very different link pattern (see if you can duplicate it.) and a sampler of different sizes of links and metals.

'Nuff said?


Go look at M.A.I.L (Maille Artisans International League) and Chainmail basket.

Last Updated on Fri, Jun 4, 2010.

Return to scott's main page.